Hey everyone, I hope you are having an incredible day today. Today, I will show you a way to make a distinctive dish, lee's spatchcocked chicken & roasted veggies. It is one of my favorites. This time, I’m gonna make it a little bit tasty. This will be really delicious.
Lee's Spatchcocked Chicken & Roasted Veggies is one of the most well liked of recent trending meals on earth. It is enjoyed by millions daily. It’s simple, it is quick, it tastes yummy. They’re nice and they look wonderful. Lee's Spatchcocked Chicken & Roasted Veggies is something which I have loved my entire life.
I hope you enjoy this Spatchcock Chicken Technique! Жареный Рецепт Цыпленка Spatchcock - ОДИН КУРИНЫЙ КУРИЛЬ. Learn how to properly spatchcock (butterfly) a chicken with our comprehensive, step-by-step tutorial and photos. How to Spatchcock a Chicken Step-By-Step.
Guide to Make Lee's Spatchcocked Chicken & Roasted Veggies
To get started with this particular recipe, we must first prepare a few ingredients. You can have lee's spatchcocked chicken & roasted veggies using 9 ingredients and 5 steps. Here is how you cook it.
Ingredients
The ingredients needed to make Lee's Spatchcocked Chicken & Roasted Veggies:
- Make ready 400 Degree Preheated Oven
- Take 3.5-4.5 Whole Chicken
- Take Heavy Duty Kitchen Shears
- Prepare 4 Tablespoons Kosher Salt
- Prepare as Needed Cracked Black Pepper
- Take Lemon Pepper Seasoning
- Prepare Cut Up Vegetables As Desired
- Prepare 1 Teaspoon Dried Italian Seasoning
- Get 4 Tablespoons Olive Oil
Valerie's spatchcocked chicken stays juicy and roasts in less time. Valerie uses the spatchcock technique for quicker roasted chicken. Spatchcocked chicken—also known as butterflied chicken—is a whole chicken that has been split by removing the backbone, and then flattened out. Splitting and flattening the bird is dual purpose—you.
Instructions
Instructions to make Lee's Spatchcocked Chicken & Roasted Veggies:
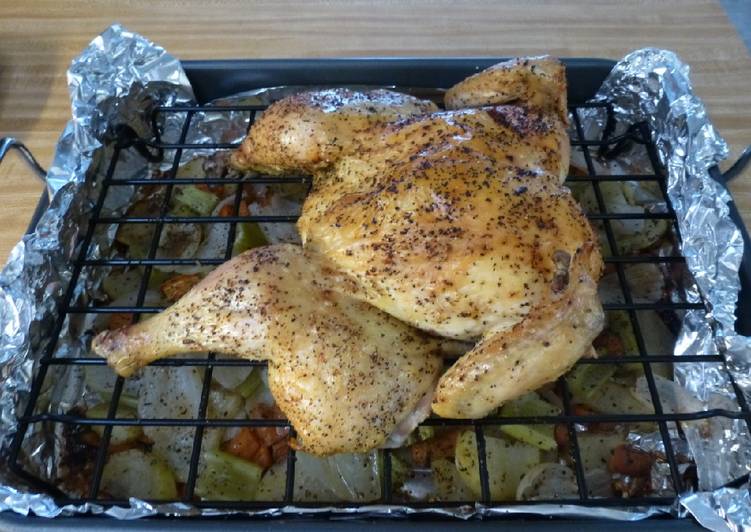
- Using kitchen shears, remove backbone and set aside. Place breast side up and press down hard until you feel the breast bone snap. The chicken will now lay flat. Save the back bone for future use. (broth)
- Coat chicken liberally on both sides with the kosher salt. Place in the refrigerator uncovered overnight. Let the salt do its magic.
- Prepare vegetables. Liberally coat vegetables with olive oil, salt, pepper, and Italian spices. I used potatoes, onion, and celery for this version. I used lemon pepper seasoning for this chicken. Use anything that you like.
- Place chicken back on roasting pan and cook until the breast meat is around 160-165 degrees. This was a 4 pound chicken and was done at 50 minutes. Use a digital thermometer to determine when it's done. Note: Chicken will cook more evenly if brought to room temperature.
- Carve up the chicken, plate with the vegetables and enjoy.
With these simple steps to spatchcock a chicken, you'll have a perfectly cooked bird. It may look tricky, but this cooking technique is so simple. A spatchcocked chicken has been flatted and the backbone removed. It gives a quicker cook time and is perfect for shortening the cook time or cooking on the BBQ. How to spatchcock (butterfly) a chicken - easy tutorial with step-by-step photos.
As simple as that Steps to Make Lee's Spatchcocked Chicken & Roasted Veggies
So that is going to wrap this up with this exceptional food lee's spatchcocked chicken & roasted veggies recipe. Thanks so much for reading. I am confident you will make this at home. There’s gonna be more interesting food in home recipes coming up. Don’t forget to bookmark this page in your browser, and share it to your family, colleague and friends. Thanks again for reading. Go on get cooking!
Print this page